Campaigns
Campaigns are the core of PhishSpot. A campaign is a simulated phishing exercise where you send a crafted email to a group of contacts, host a fake landing page to capture interactions, and optionally redirect users to a training course after they click.
4.1 Campaigns List
Section titled “4.1 Campaigns List”Navigate to Campaigns from the sidebar to see all campaigns in your account. The list displays:
| Column | Description |
|---|---|
| Name | The campaign name (clickable to view details) |
| State | Current status: Draft, Scheduled, Active, Paused, or Done |
| Delivery Mode | How emails are sent: Immediate, Scheduled, or Staggered |
| Delivered | Number of emails sent out of total recipients |
| Created At | When the campaign was created |
| Actions | Buttons for Edit, Duplicate, and Delete |
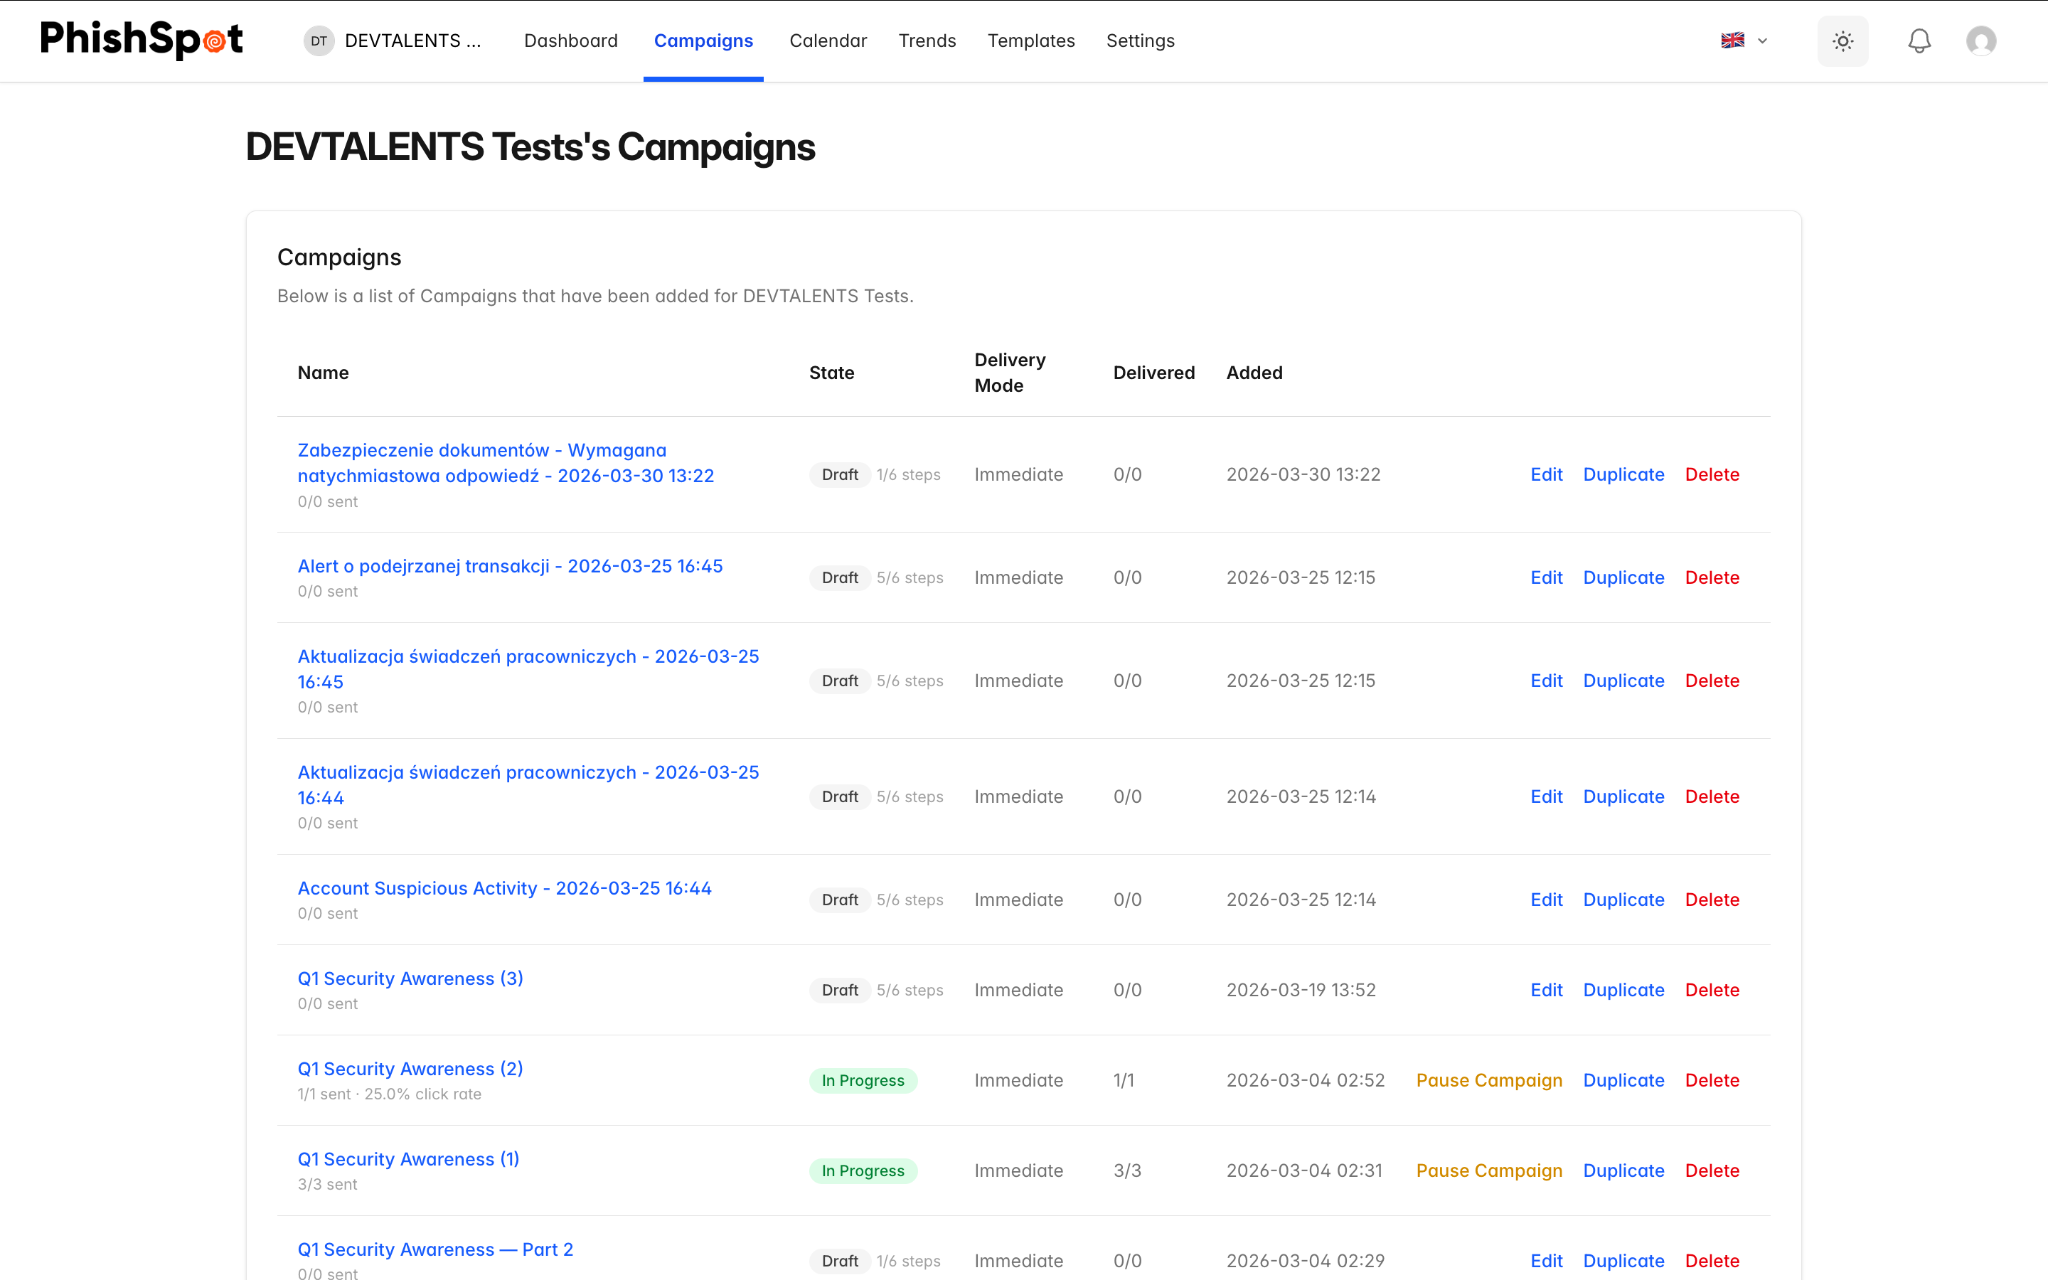
From this page you can also generate a Cumulative Report PDF that combines data from multiple campaigns.
4.2 Creating a New Campaign
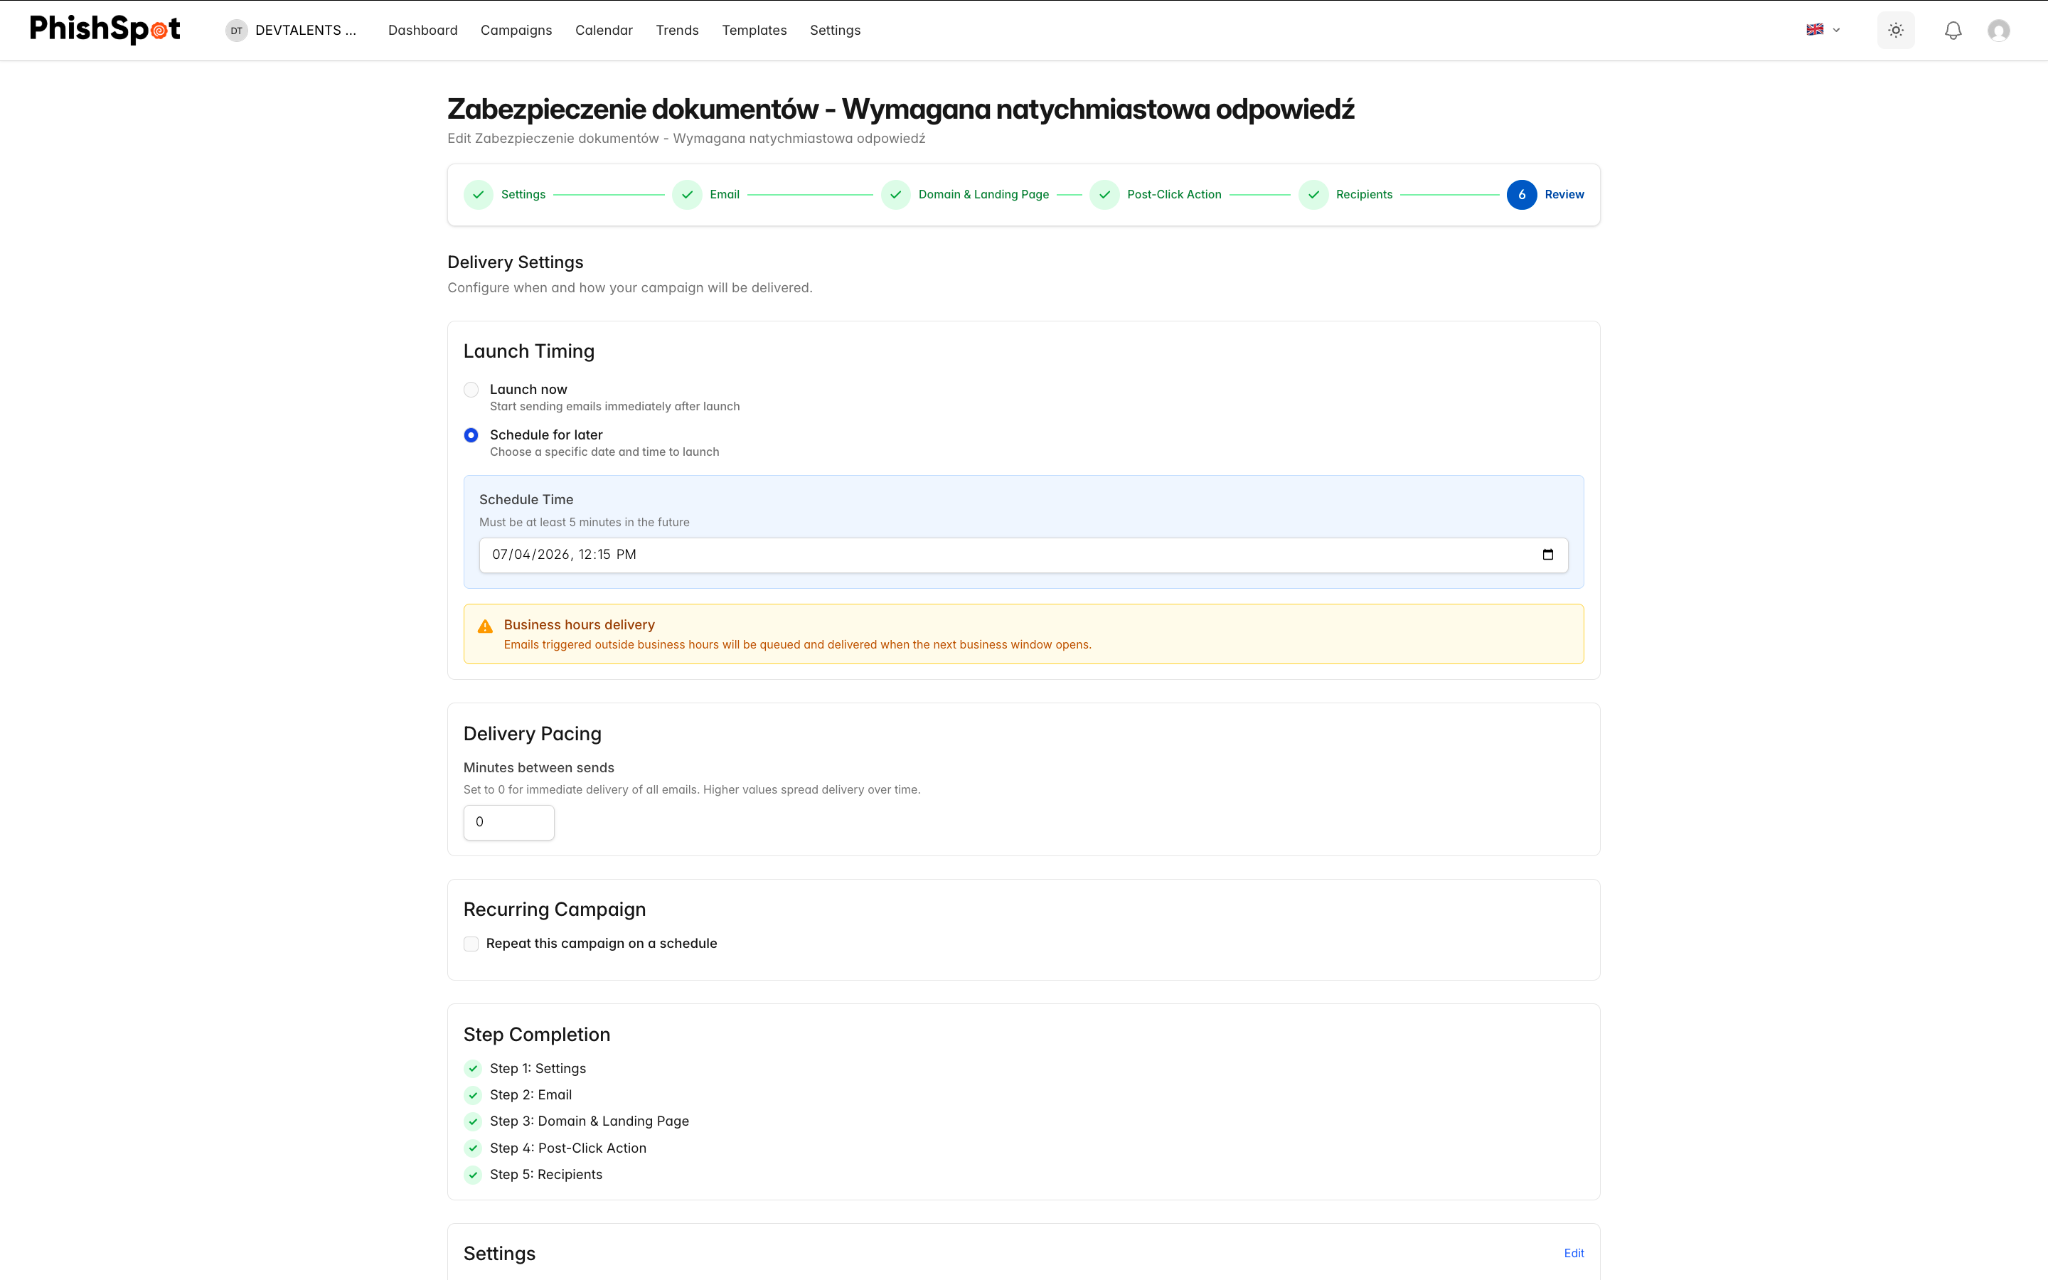
Section titled “4.2 Creating a New Campaign”Click the New Campaign button to start the campaign creation wizard. The wizard guides you through six steps:
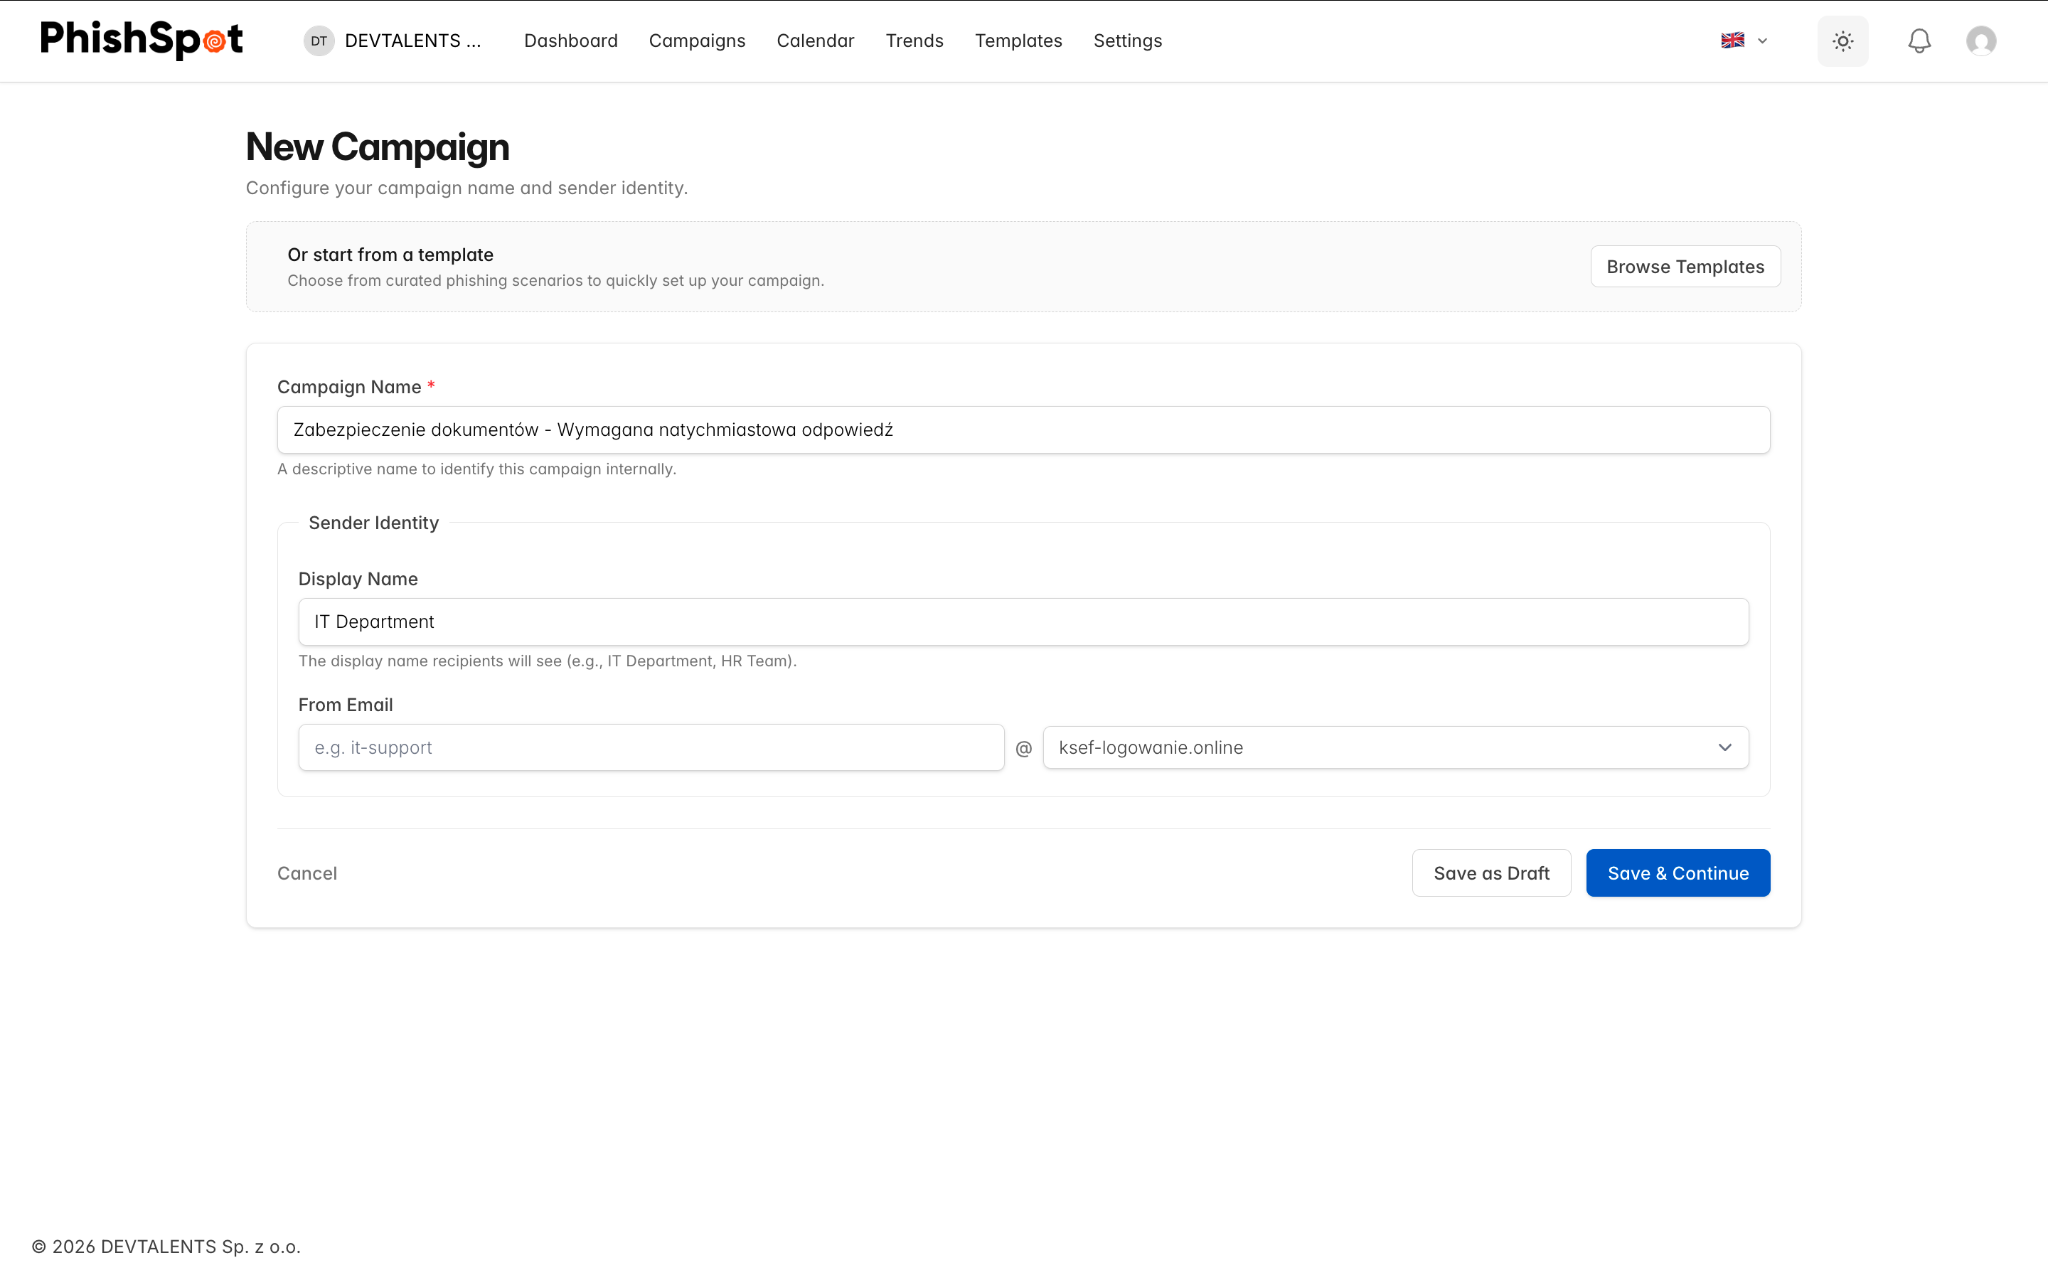
Step 1: Settings
Section titled “Step 1: Settings”Configure the basic campaign parameters:
-
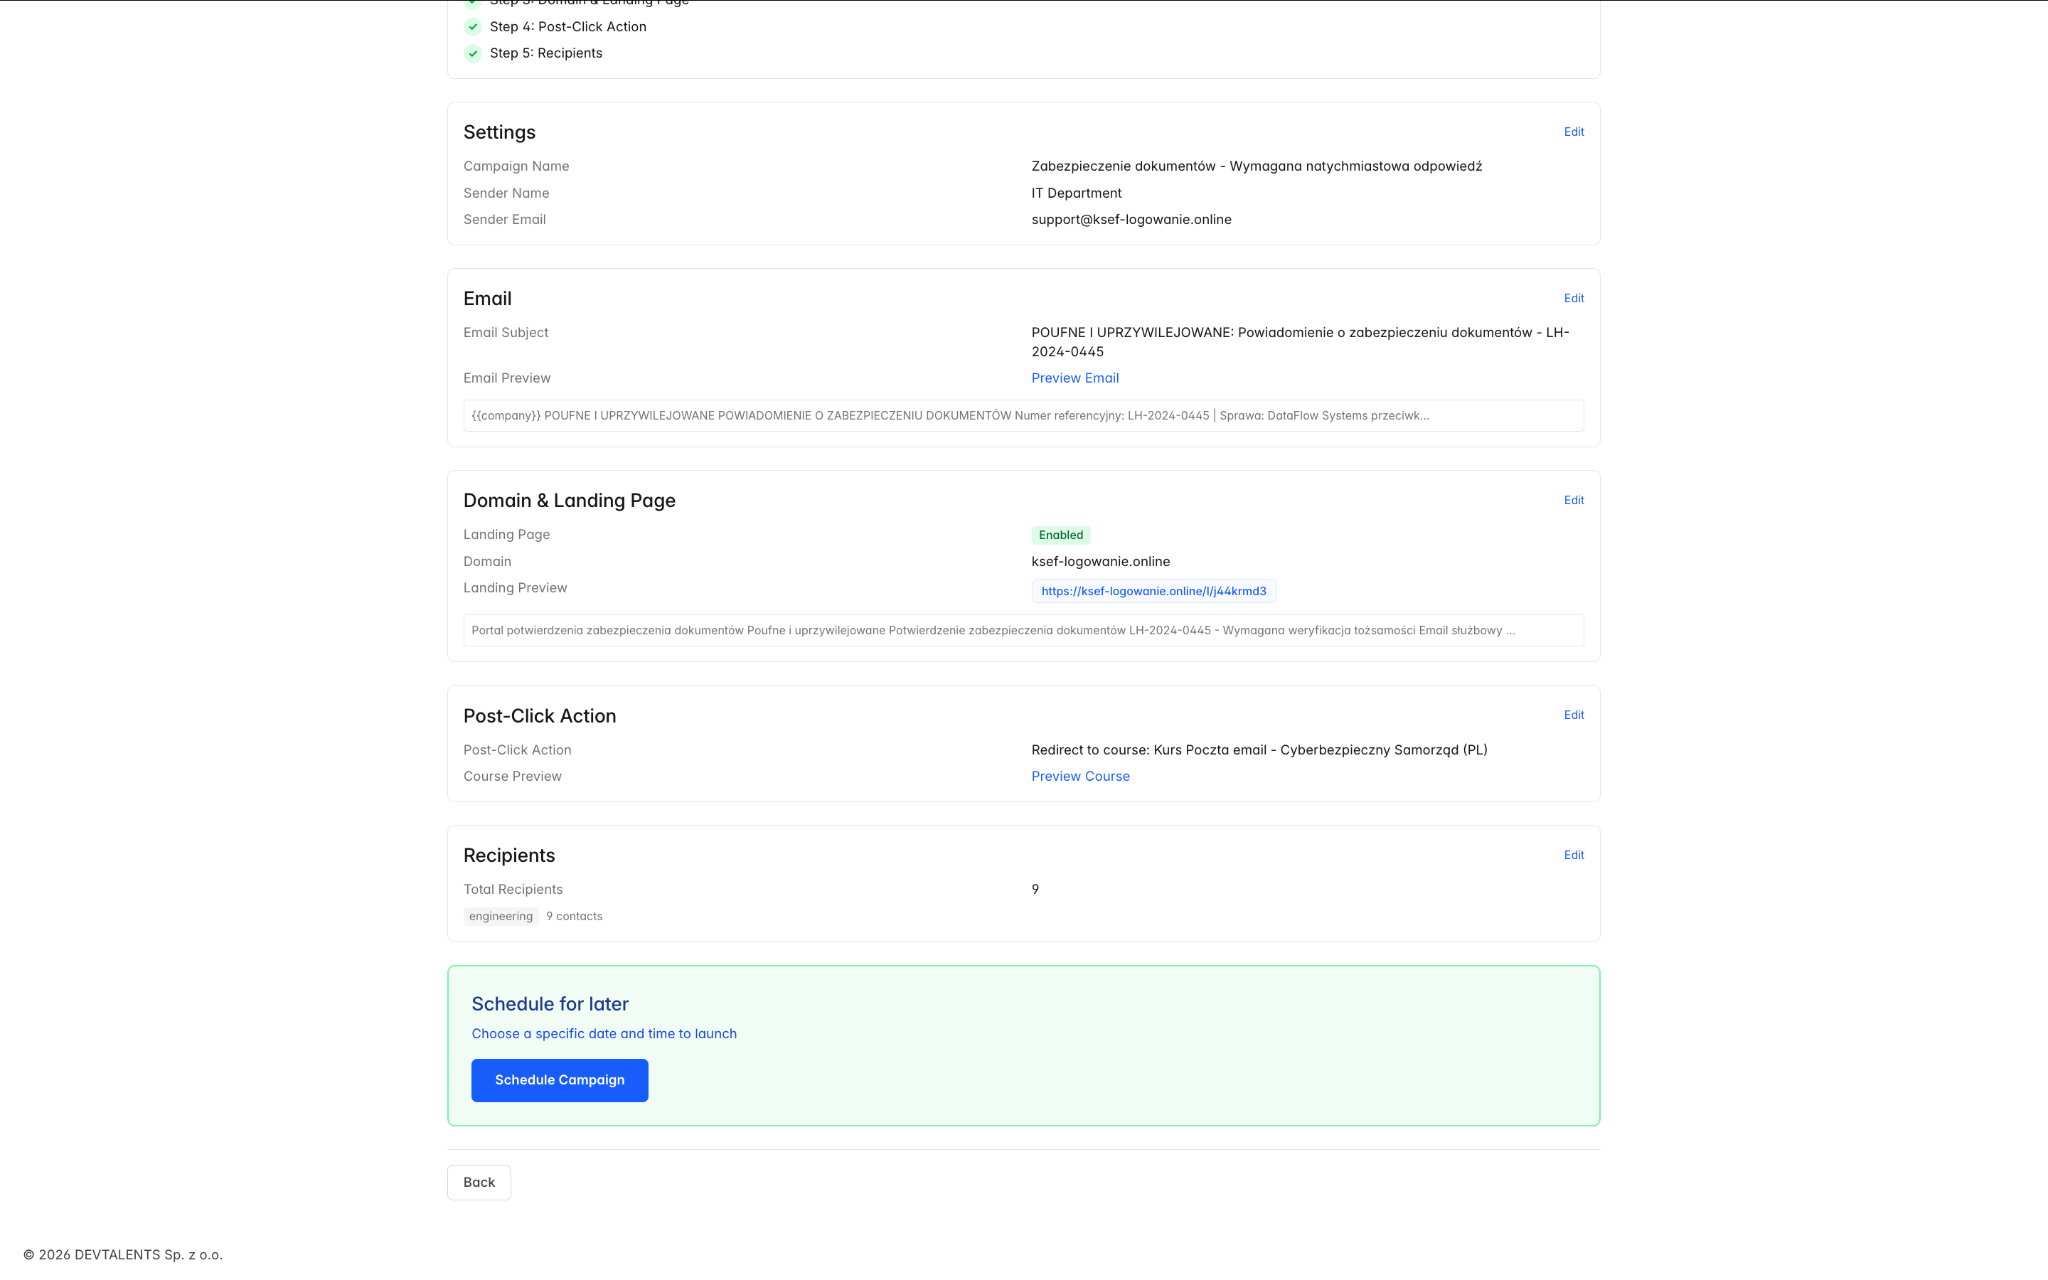
Campaign Name — Give your campaign a descriptive name (e.g., “Zabezpieczenie dokumentów - Wymagana natychmiastowa odpowiedź”).
-
Sender Identity — Provide Display Name and From Email
-
Display Name — Provide Display Name
-
From Email — Provide Email Username and Select Domain
-
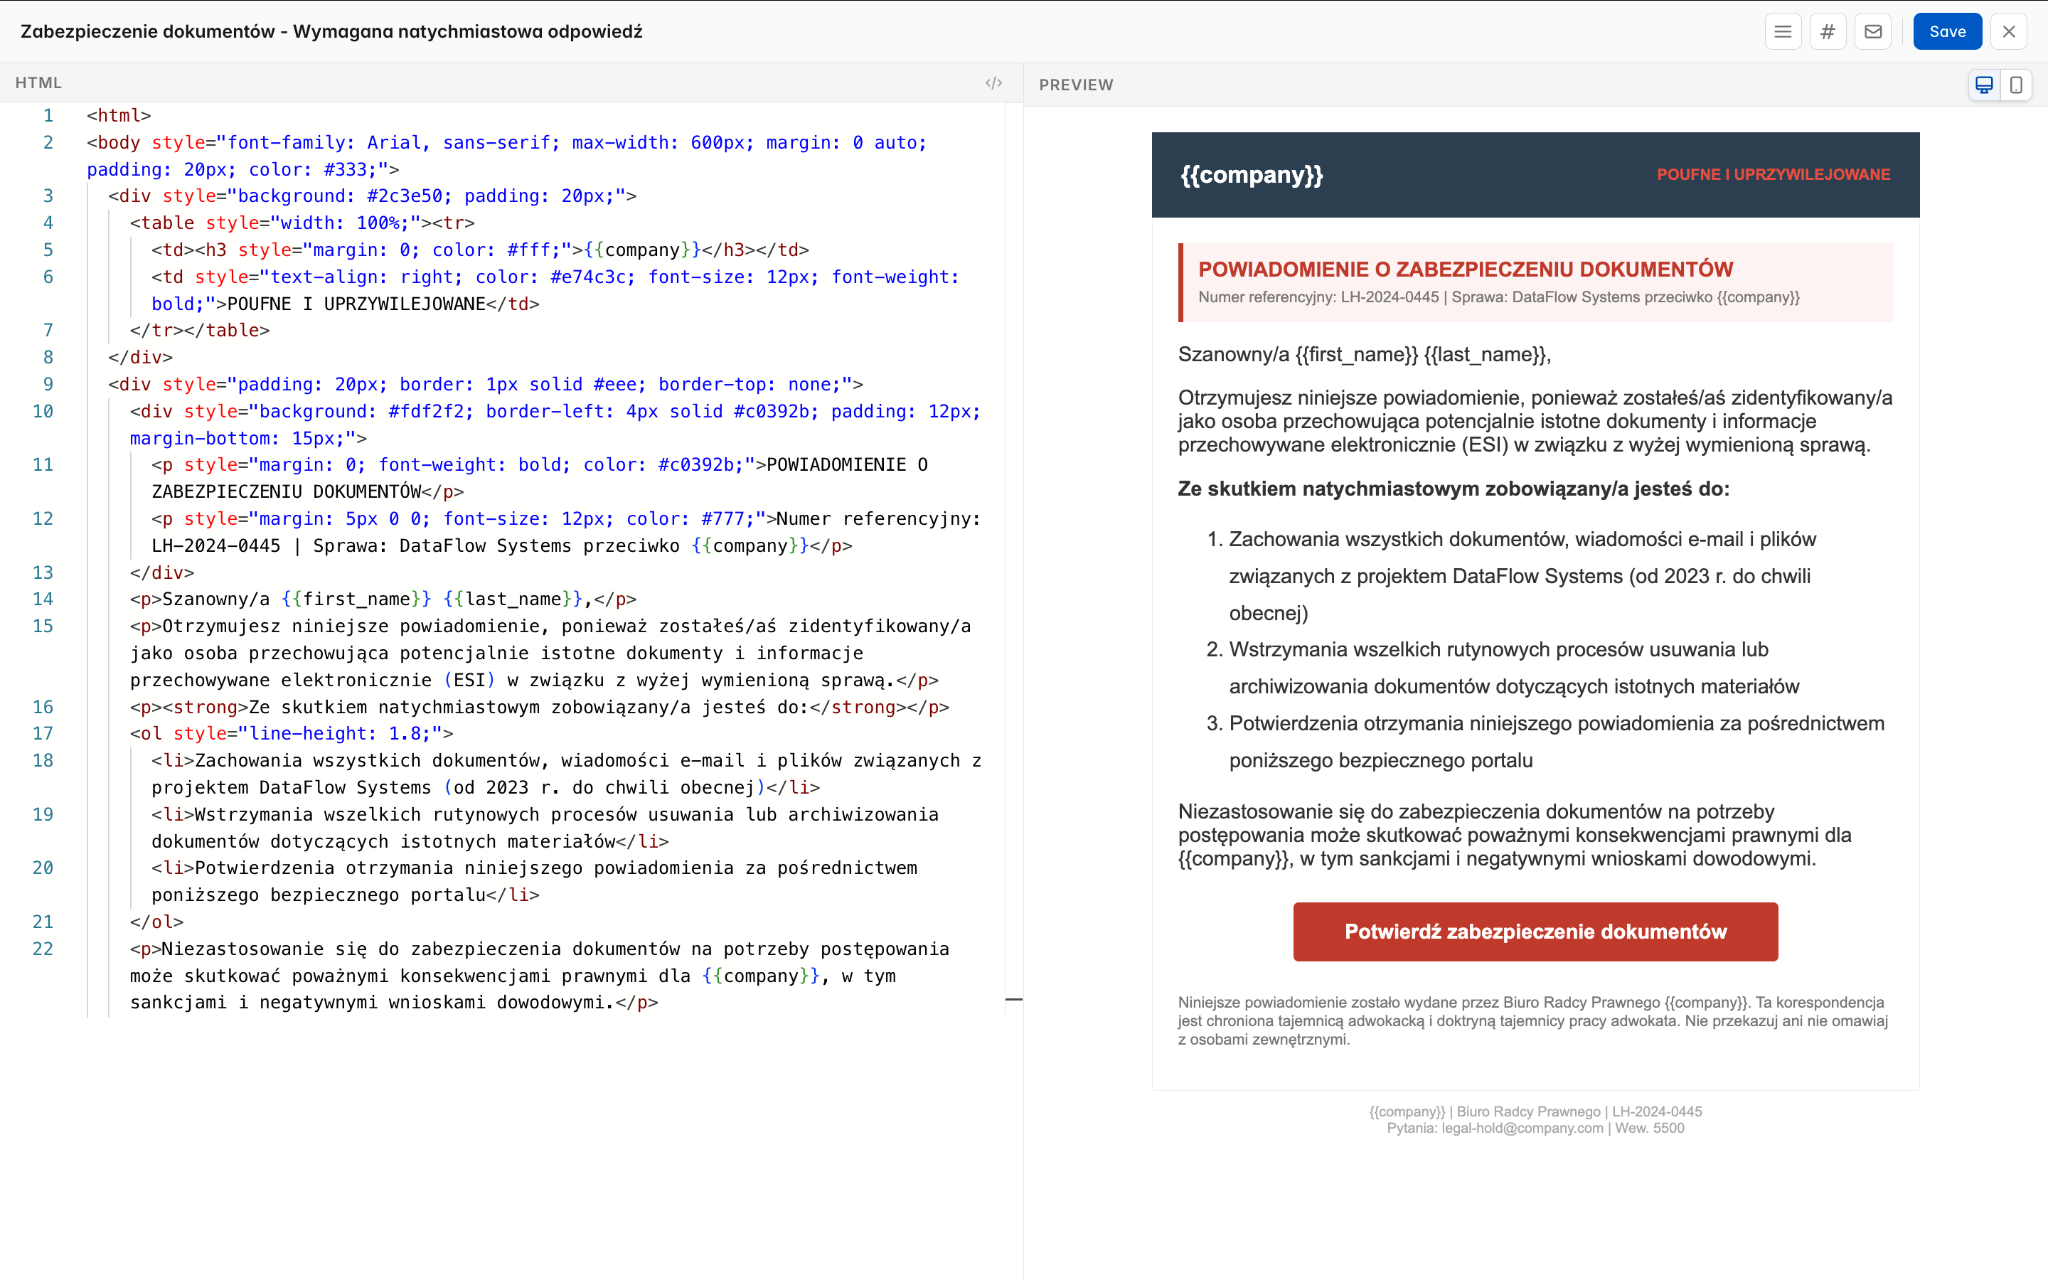
Step 2: Email Content
Section titled “Step 2: Email Content”Design the phishing email your targets will receive:
-
Email Subject — The subject line of the phishing email.
-
Email Content — The HTML body of the email. Click the Edit Code button to open the Monaco code editor where you can write or paste HTML. The editor provides syntax highlighting and a live preview.
You can use template variables in both the subject and body to personalize emails. Common variables include the recipient’s first name, last name, and email.

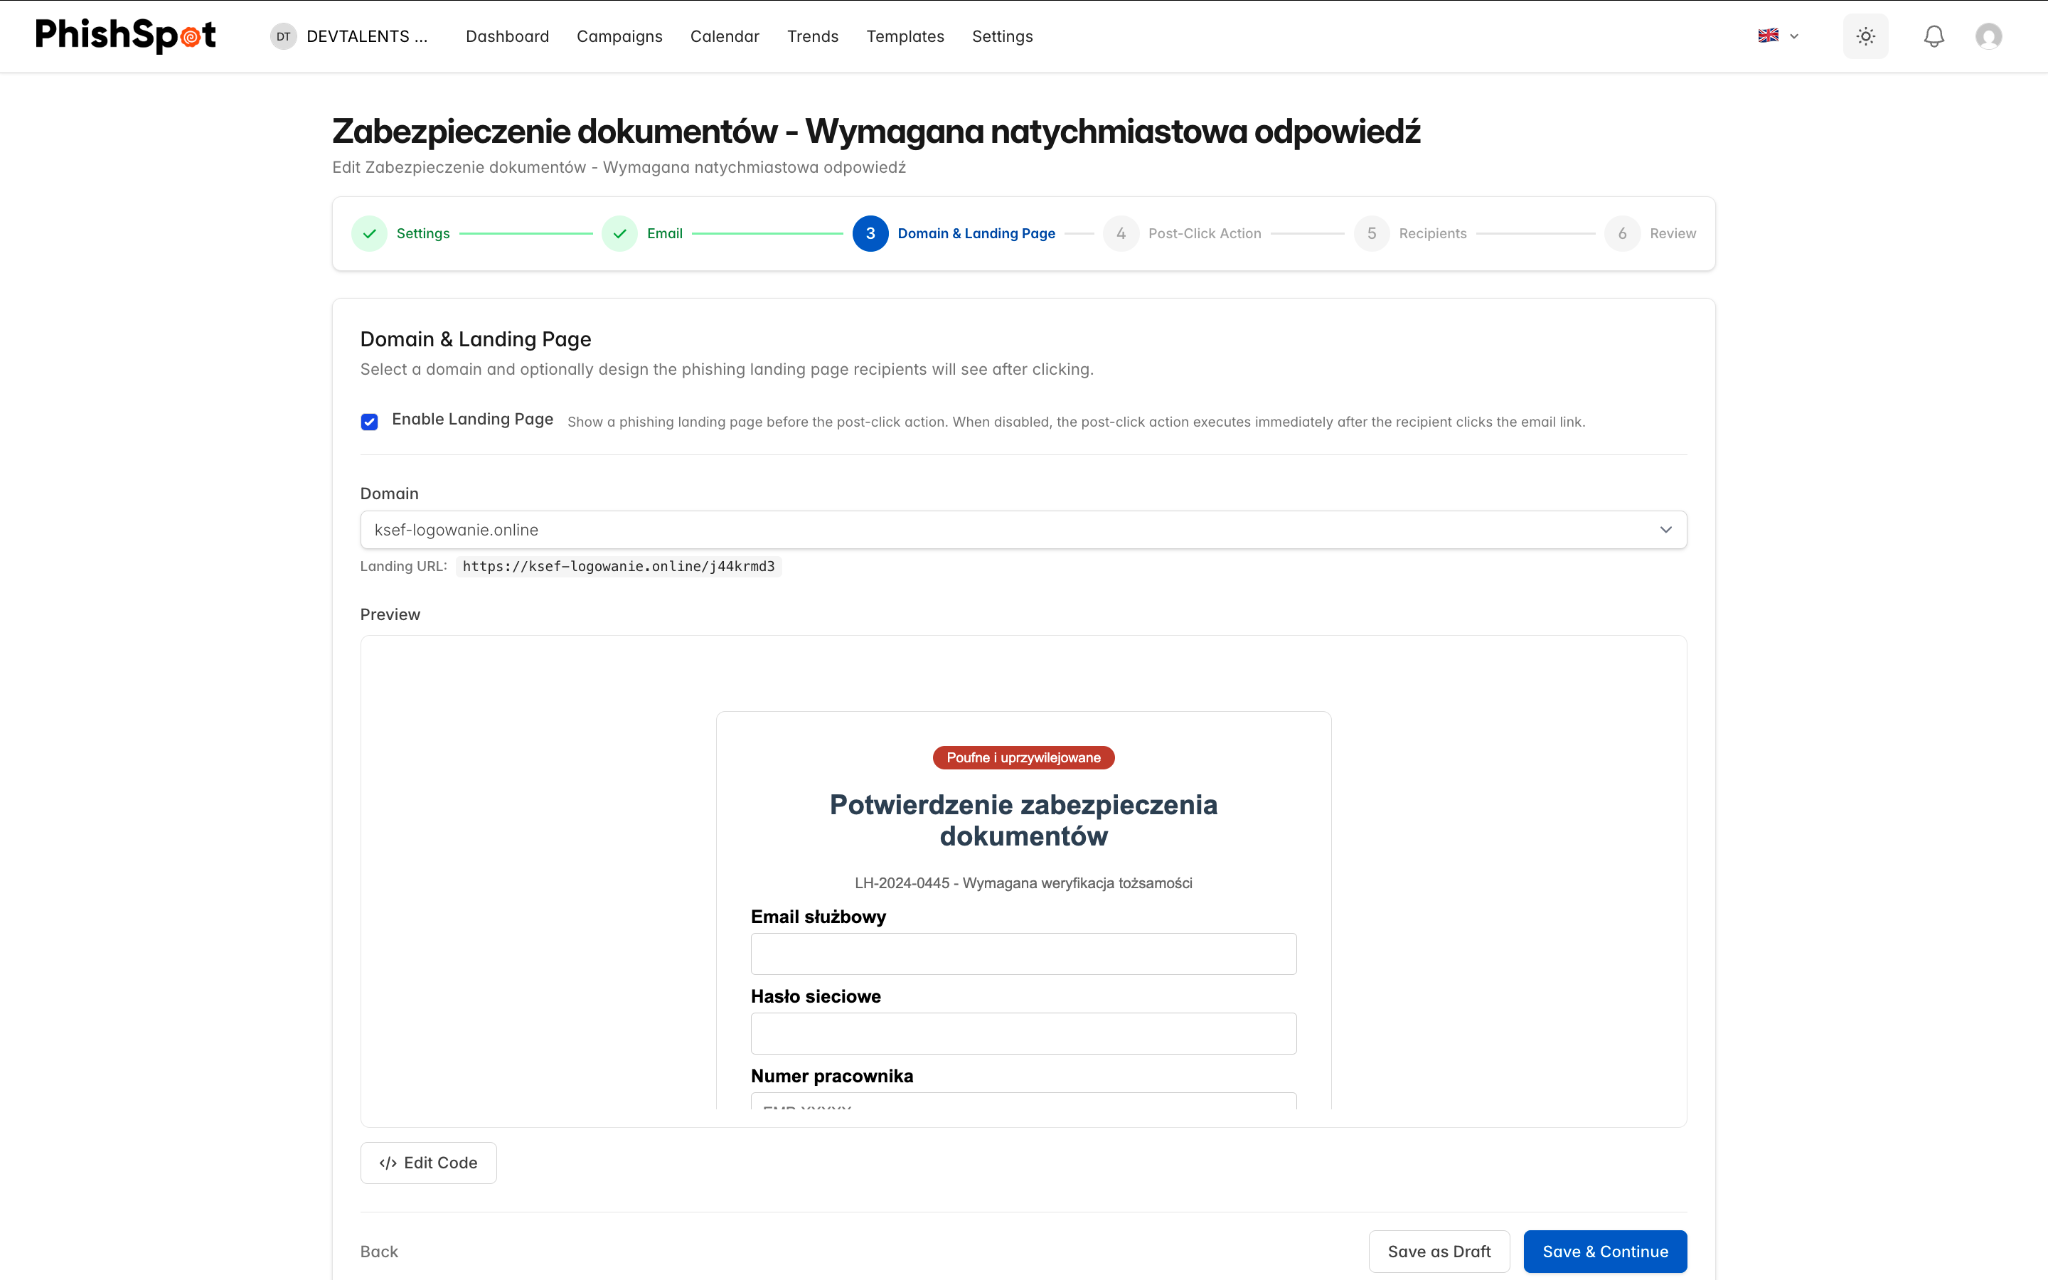
Step 3: Landing Page
Section titled “Step 3: Landing Page”Configure the fake landing page that recipients will see when they click the phishing link:
-
Platform Domain — Select which domain to use for your landing page URL.
-
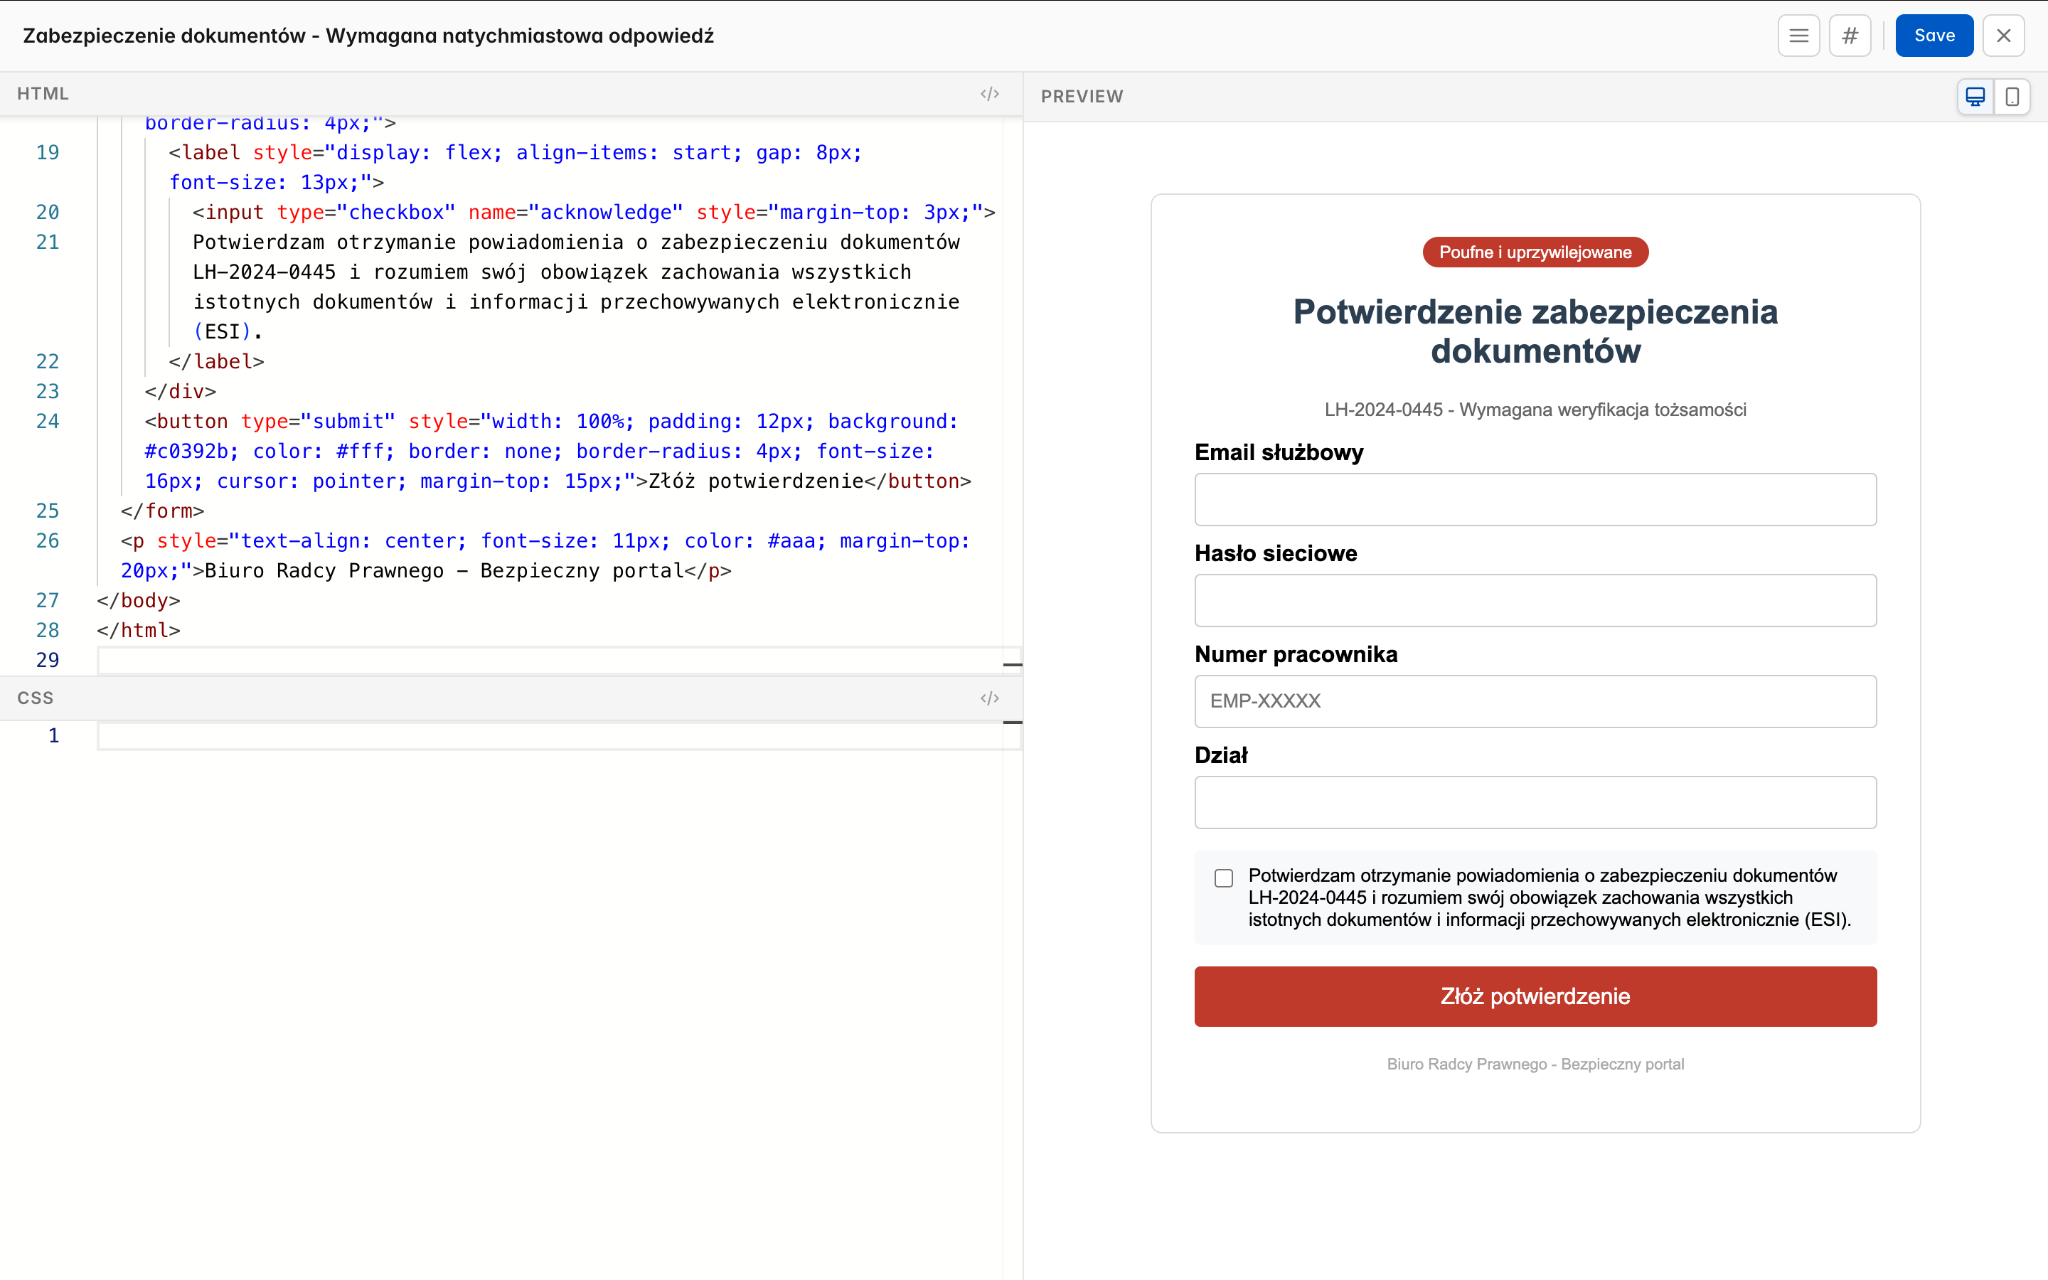
Landing Page Content — Edit the HTML of the landing page using the visual editor. This is the page that mimics a legitimate login form or similar.
-
Enable/Disable Landing Page — You can choose to track clicks only without hosting a landing page.
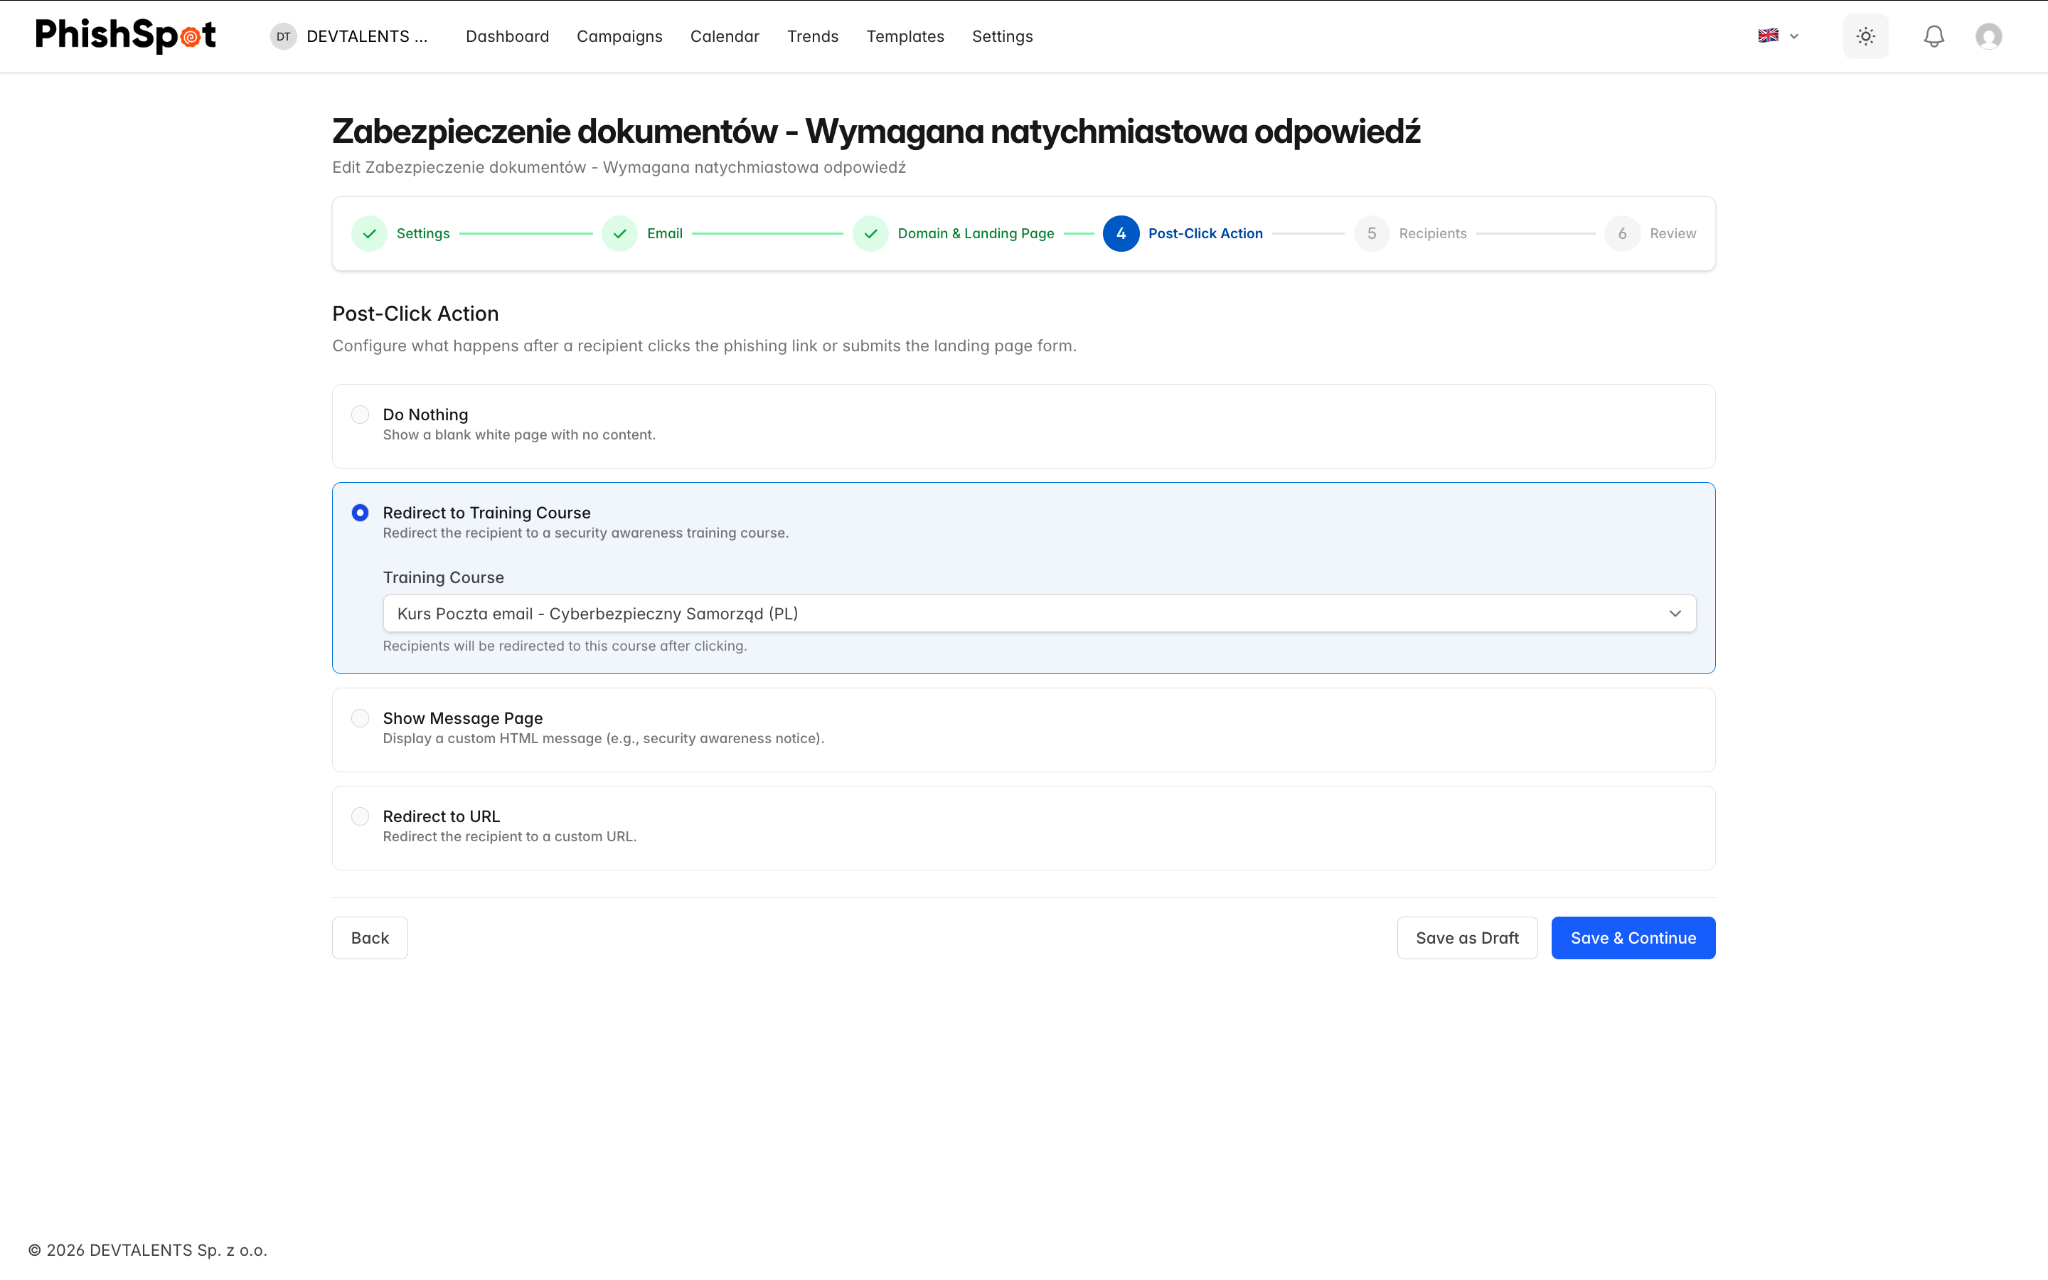
Step 4: Post-Click Action
Section titled “Step 4: Post-Click Action”Define what happens after a recipient interacts with the landing page:
-
Training Course — Assign a security awareness course that the user is redirected to after clicking or submitting data.
-
Custom Redirect URL — Redirect the user to a specific URL instead.
-
Awareness Page — Display a built-in awareness message explaining that this was a simulation.
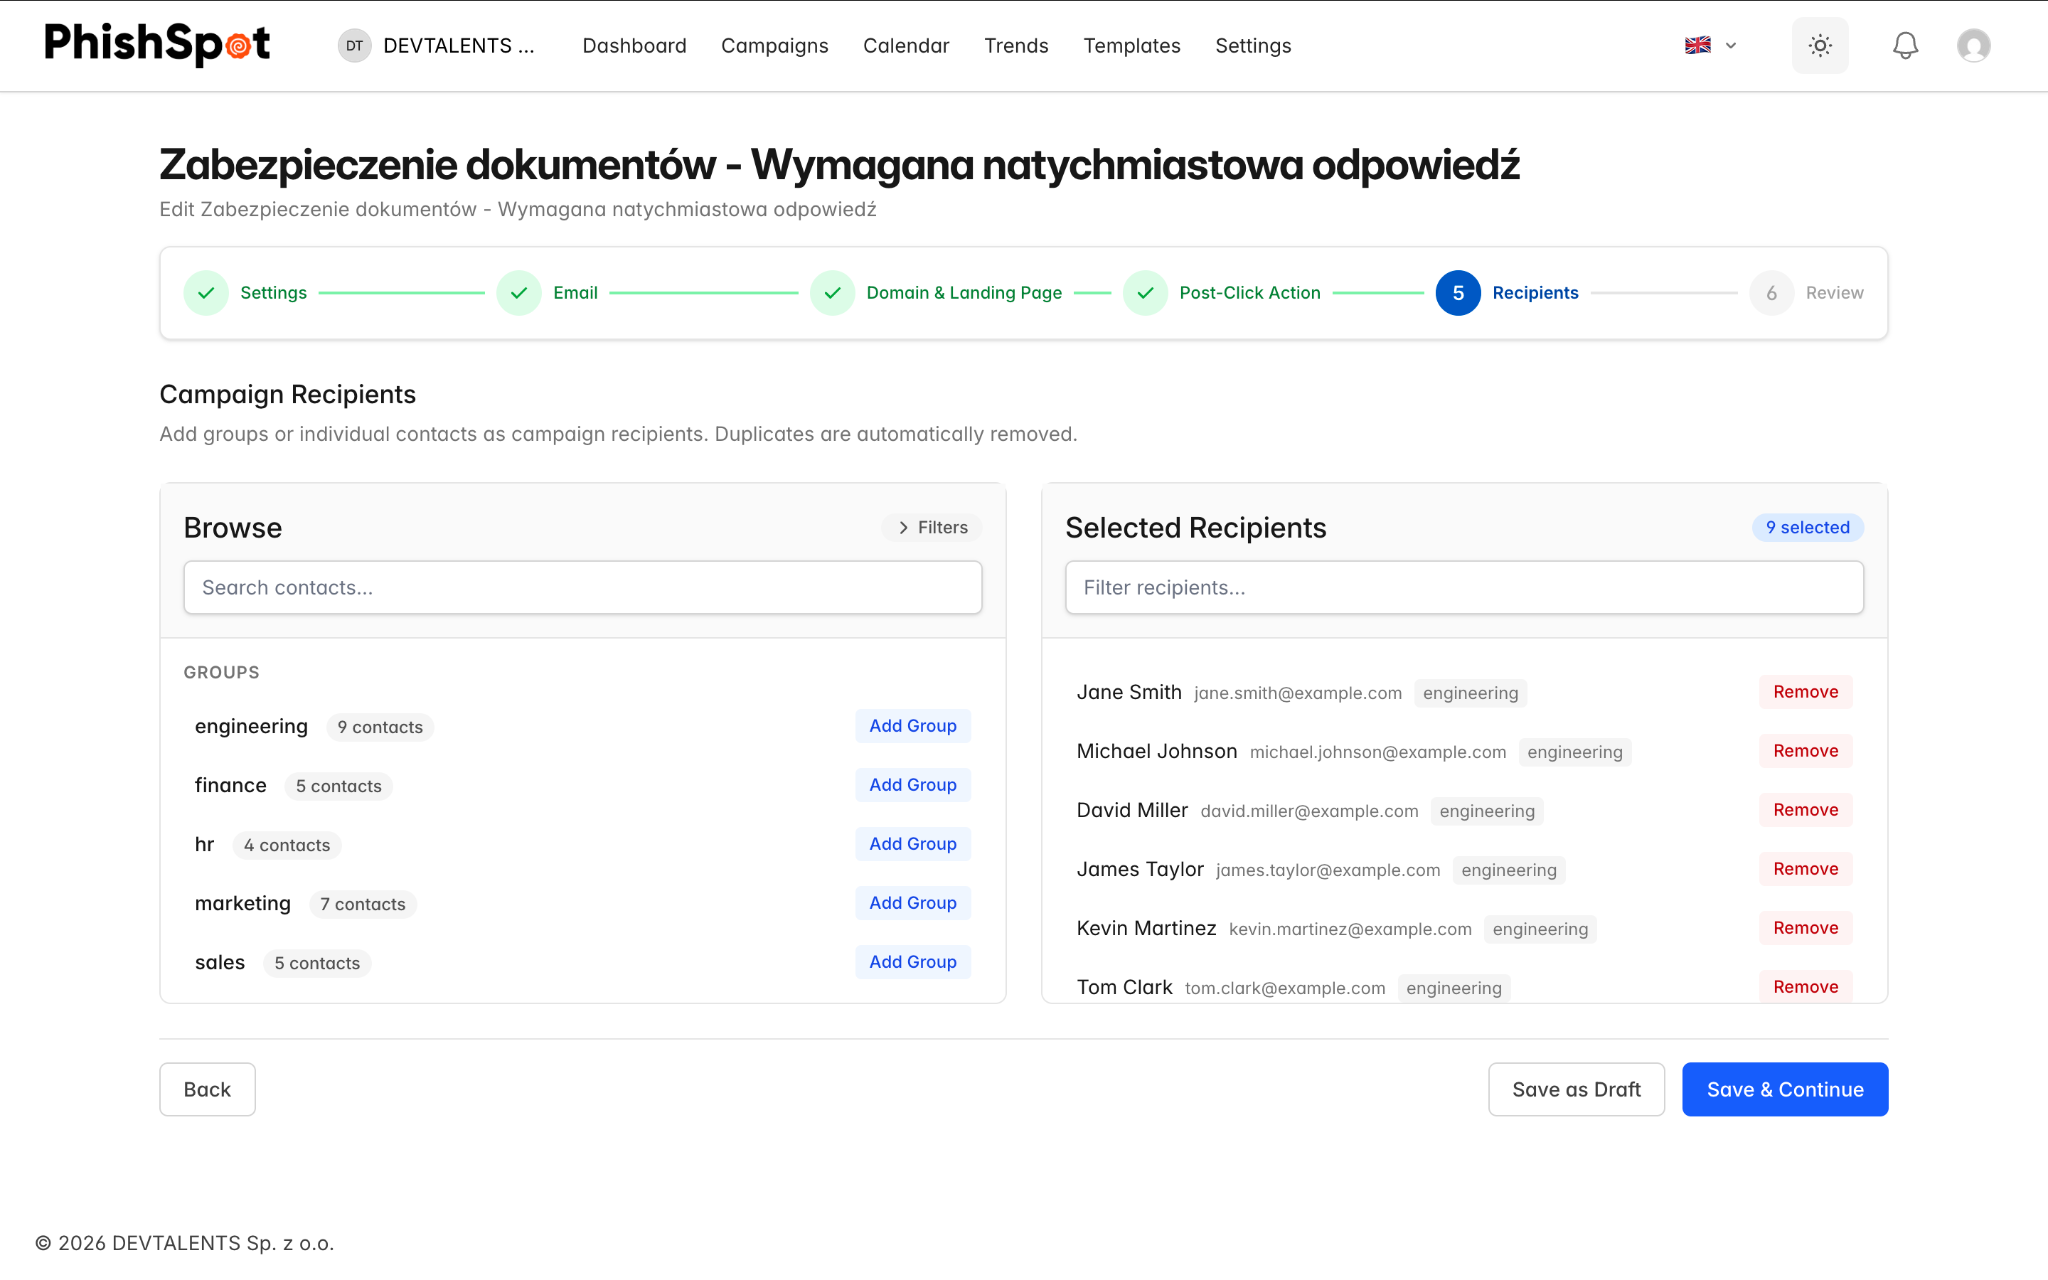
Step 5: Recipients
Section titled “Step 5: Recipients”Select who receives the campaign emails:
-
Browse your contacts and add individuals or entire groups
-
Review the selected recipients list
-
Remove specific contacts if needed
-
The contact browser supports search and filtering by department, title, and location
Step 6: Review & Launch
Section titled “Step 6: Review & Launch”Review all campaign settings before launching:
-
Summary of email content, landing page, recipients, and delivery settings
-
Final confirmation before starting the campaign
-
Option to save as draft and launch later
4.3 Campaign States
Section titled “4.3 Campaign States”A campaign moves through these states during its lifecycle:
| State | Meaning | Available Actions |
|---|---|---|
| Draft | Campaign is being configured and has not been sent | Edit, Start, Schedule, Delete |
| Scheduled | Campaign is set to launch at a future date/time | Edit, Reschedule, Cancel Schedule, Delete |
| Active | Campaign is currently sending or has sent emails | Pause, Stop, View Dashboard |
| Paused | Campaign sending is temporarily paused | Resume (Start), Stop |
| Done | All emails have been delivered and tracking is complete | View Dashboard, Export Reports, Duplicate |
4.4 Campaign Actions
Section titled “4.4 Campaign Actions”From a campaign’s detail page, you have access to several actions depending on its current state:
-
Start — Begin sending the campaign immediately.
-
Pause — Temporarily halt email delivery (can be resumed).
-
Stop — Permanently stop the campaign. Remaining unsent emails will not be delivered.
-
Schedule / Reschedule — Set or change the future delivery date.
-
Duplicate — Create a copy of the campaign as a new draft.
-
Save as Template — Save the current email content as a reusable phishing template.
-
Send Test Email — Send a test version of the email to yourself to verify formatting.
-
Export Report — Download campaign results as PDF or Excel.
4.5 Campaign Dashboard
Section titled “4.5 Campaign Dashboard”Once a campaign is active or complete, you can access its dashboard for detailed analytics. The campaign dashboard includes:
-
Funnel Chart — Visual funnel showing Sent → Delivered → Opened → Clicked → Submitted, with conversion percentages at each stage.
-
Group Breakdown — Performance metrics broken down by contact group.
-
Department Breakdown — Performance metrics broken down by department.
-
Recipients Table — A list of every recipient with their individual status (sent, delivered, opened, clicked, submitted).
-
Recipient Timeline — Click on any recipient to open a side panel showing their complete event timeline (when the email was sent, opened, link clicked, page visited, data submitted, course started/completed).
-
Export CSV — Download the full recipient data as a CSV file for further analysis.
4.6 Recurring Campaigns
Section titled “4.6 Recurring Campaigns”PhishSpot supports recurring campaigns that automatically repeat at set intervals. When configuring a scheduled campaign, enable the Recurring checkbox in the schedule step and set two values:
- Interval — a number (e.g.,
1,2,4). - Unit —
days,weeksormonths.
So 1 week runs the campaign every seven days; 2 months runs it every other month. Each recurrence creates a child campaign linked to the original parent — the parent stays as the canonical template (its content, recipients and post-click action are snapshotted into each child at launch time), and the children carry their own reports. Edits to the parent only affect future recurrences; in-flight children keep the configuration they were launched with.
To stop a recurring series, open the parent and cancel it — that prevents future children from being created. Children already launched continue to completion independently.
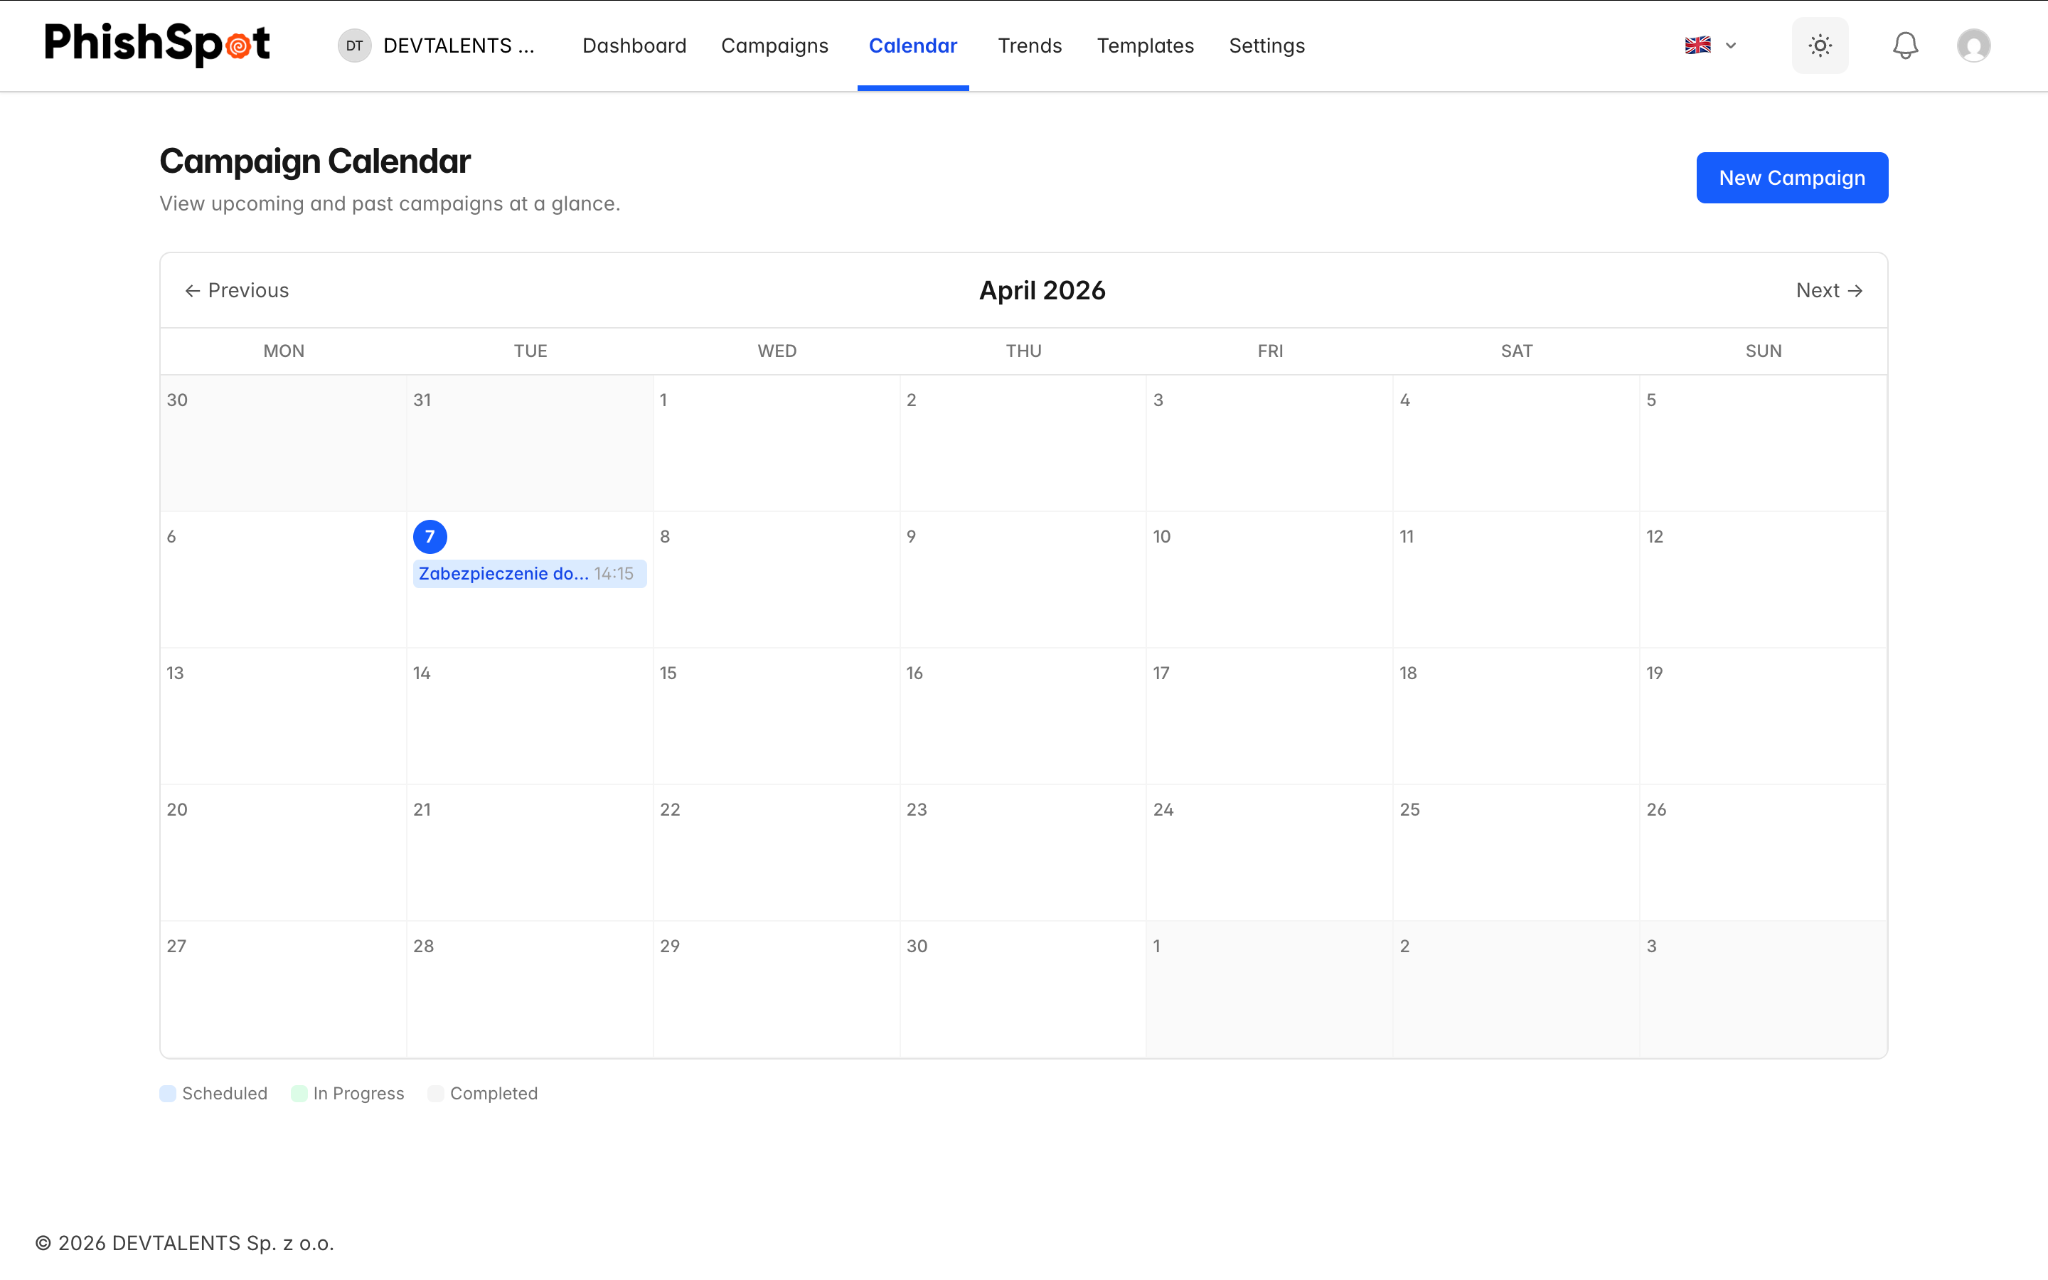
4.7 Campaign Calendar
Section titled “4.7 Campaign Calendar”The Campaign Calendar provides a visual calendar view of all scheduled and past campaigns. You can navigate between months and click on any campaign entry to go directly to its detail page. This is useful for planning your phishing program and avoiding schedule conflicts.